Creating good graphics is vital for website owners. How do you make them? I use Canva.
What is Canva?
Canva is an online graphic design tool that allows you to make professional-looking images and graphics. You can use the tool in any browser without downloading anything. It is so easy to use that you can create your own banners and images free with no special design skills or knowledge.
Below are the blog banners (featured images) I created in the past using Canva. They look quite neat, don’t they? I assure you that I don’t have any special graphic skills or techniques. Yet, I still could create these eye-catching images and to be honest with you, I surprised myself! 
The blog banners can make a big difference in your content promotion. It’s not only that your content will look more appealing to the readers, but they also make it easier to promote your blog post in social media. Especially in visual-oriented medias such as Pinterest and Instagram, where text description is quite limited, these banners come in handy to promote your content.
How Much Is It?
Here is the best part. Canva is 100% free to use!
All you need to provide is your email address and password, and you are ready to start making professional-looking images with Canva!
The only time you may have to spend money is when you chose to use their premium (paid) resources, such as photos and graphics. Even then, they are only $1/each and very affordable.
Personally, I have not used their paid resources yet as Canva provides tons and tons of free materials!
In this article, I will walk you through how I made the banner you see below: Make Your Own Banner Free.
By the end of this blog, I am sure you feel confident making your own images. 🙂 Let’s begin, shall we?

How to Make Your Own Banner Free – Step by Step
1. Pick a Template (or Set Dimension)
Log into Canva. The first thing you will see is the vast selection of common templates.
You can pick a perfectly sized template depending on your purpose; Facebook ad, Twitter banner, Instagram post, or Kindle book cover, you name it. All you have to do is click on the template you want to use.
To create a featured image of your blog post, you can choose “Blog Title” (560 x 315 px) if the size fits in your website theme.
For a featured image of this blog site you are reading now, I normally set my dimension by choosing “Use custom dimensions” (upper right corner).

The size 800 x 425 seems to best fit in this website theme. But again, this depends on the theme you are using and you may want to figure out the best size for your website by trying out different templates.
Click “Design!”

2. Upload a Photo
You will be taken to a page looking like below. In the center, there is a work area where you work on your image and on the left-hand side, you’ll see a taskbar.
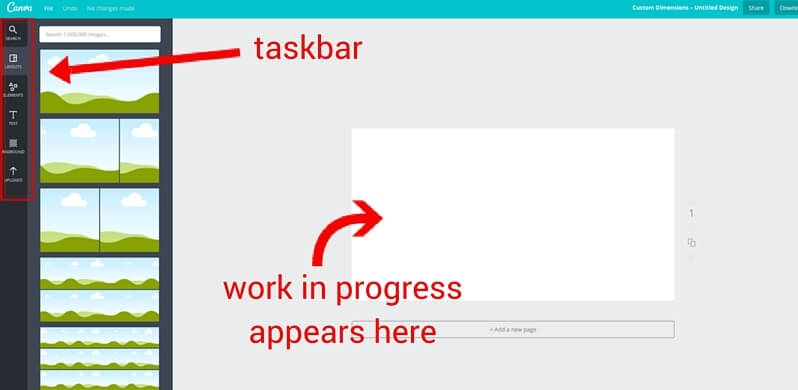
First, let’s upload a photo to use in the blog banner. Click “Uploads” (#1 in the pic below) at the very bottom of the taskbar.
Here you have two options. You can either upload your own photo from your computer (#2) or find an image from Canva’s own selections. (#3) To browse through their images (and there are tons!), simply type in a keyword in the search bar (#3), such as “snowy mountain,” and hit enter.
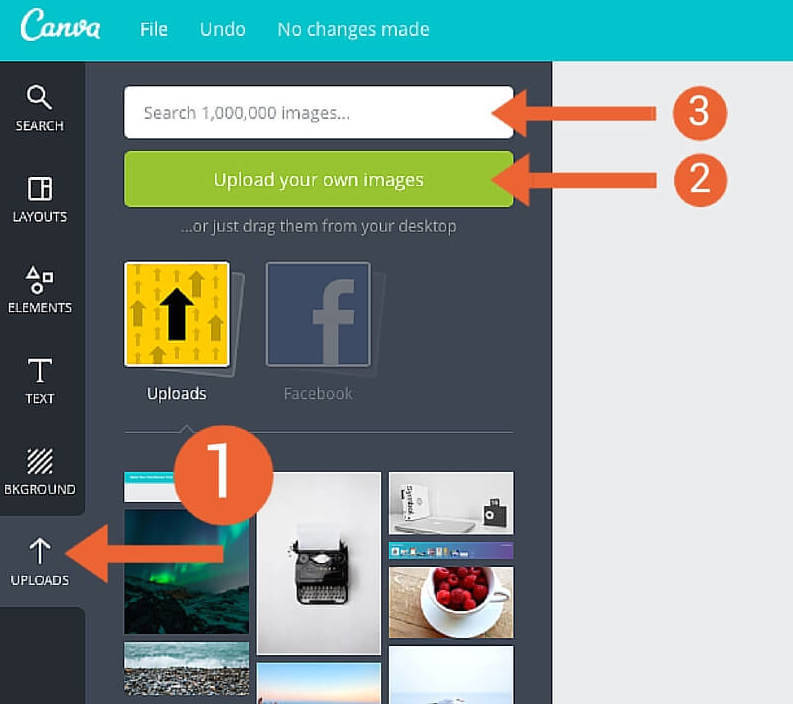
Beware that some images are free and some cost you $1/image. If you chose a paid image, you’ll have to make the payment later at the time of downloading the final product.
I uploaded this photo from my computer, but you can find tons of similar photos on Canva as well.
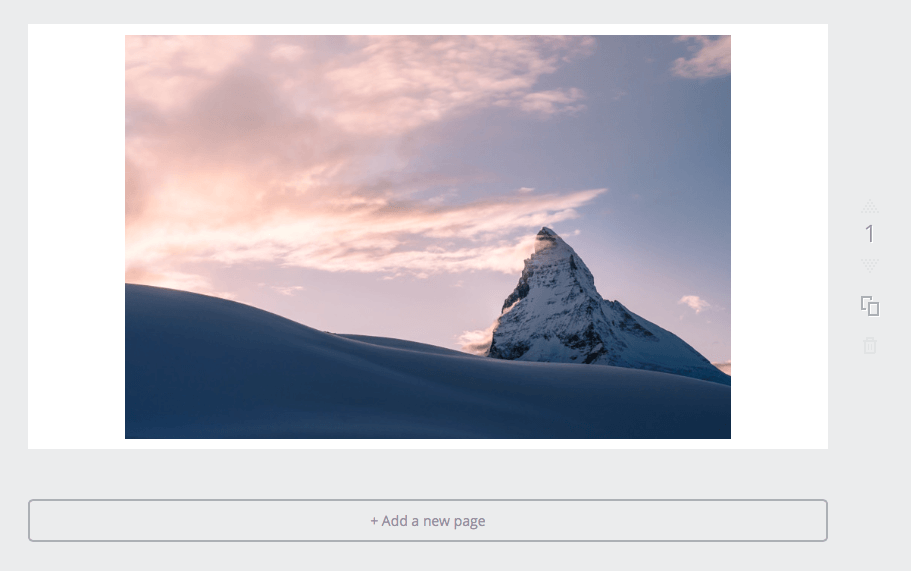
Now, do you see the white area surrounding the image above? Apparently, this photo was not big enough to fill the dimension 800 x 425.
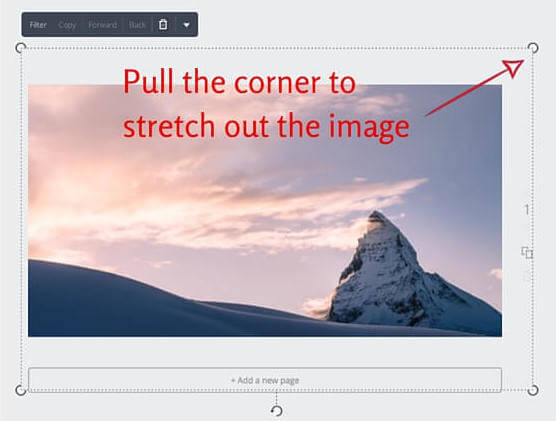
But do not worry. You can stretch out the image to fit the size, or enlarge it even bigger to highlight the part of the image you want to include in the design! For this feature, you simply need to click the image once, grab one of the four corners, and pull it outward to enlarge the image.
3. Add Text
Now we are going to add the text.
Click “Text” in the taskbar and then “Add heading.”
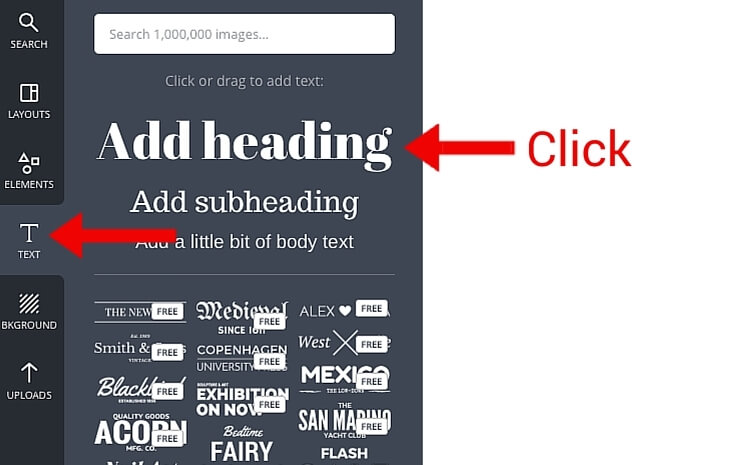
Type in the phrase you want to add to the banner. I decided to include the title of this blog “Make Your Own Banner Free.”
The default font looks like the one below. If you are happy with it, you can leave it as is. Of course, you can freely change it as you like too, in terms of the font type, font size, and font color.
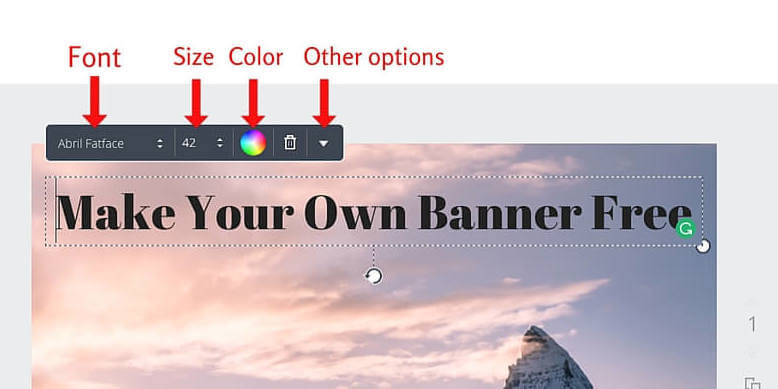
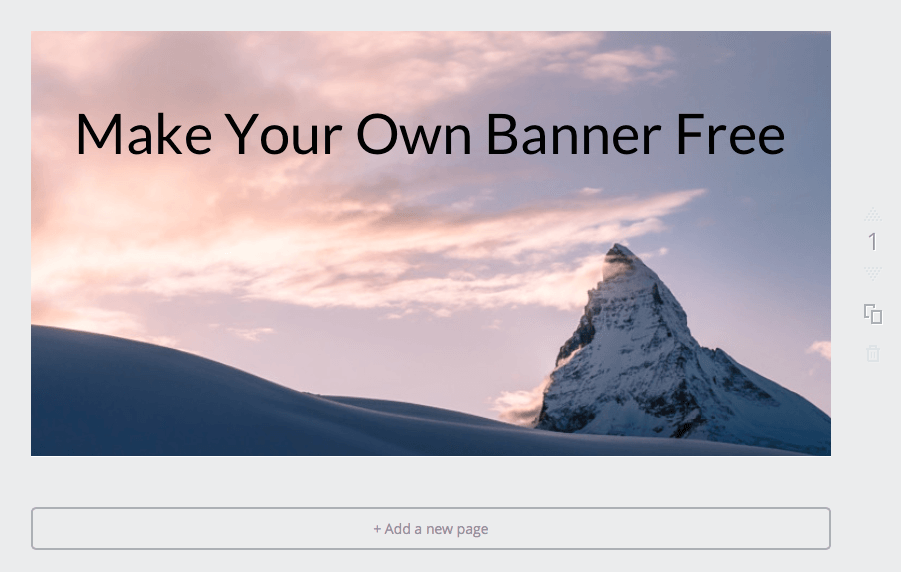
I changed the font to the one called “Lato.” What do you think compared to the original one above?
I think I like this one better than the default one. Now I want to change the color too as black text on this particular image looks a little gloomy.
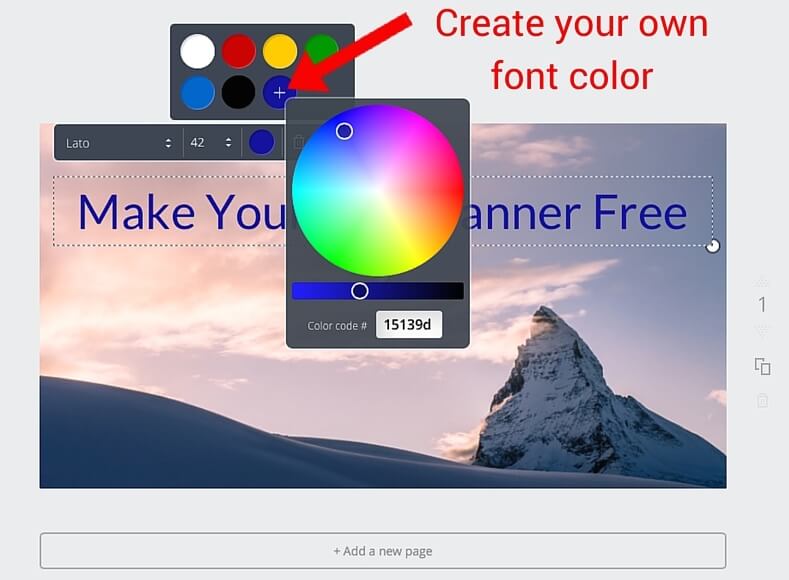
Click on the color tag. Canva initially gives you the six pre-selected colors. Of course, they are not the only font colors available. If you click the plus “+” symbol, you can adjust the font color exactly as you like.
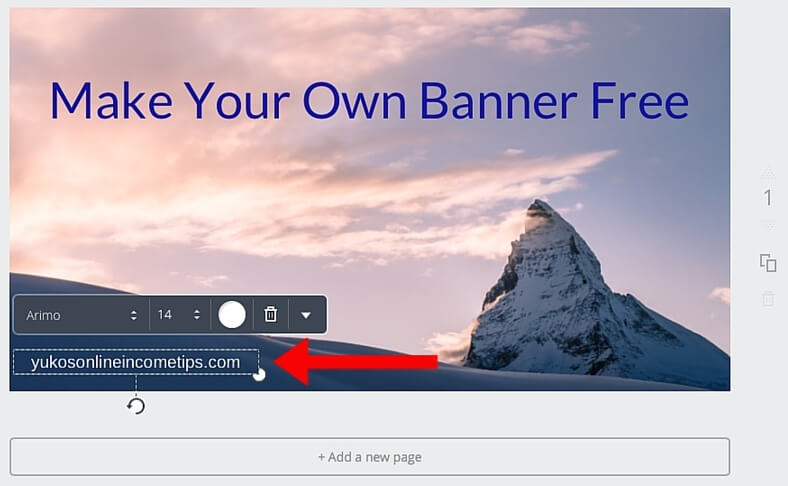
My blog banner is almost done. The last touch I want to add is to place my website domain somewhere within the image.
This is what I have started doing recently as I realized including the URL is effective to promote the website every time I share a new blog banner in social medias such as Pinterest, Instagram, and even Twitter because they are very visual-oriented. I recommend you to do the same. After all, the image belongs to your website, right?
4. Download
It’s time to download your masterpiece 🙂
In the upper-right corner, you will see the “Download” button. Simply click it to download your work as image files (JPG or PNG) or as PDF files. I always choose JPG.
By the way, in the same area you will also see the design title that Canva picked up for the image. If you wish to change it, just click the title and you can rename it.

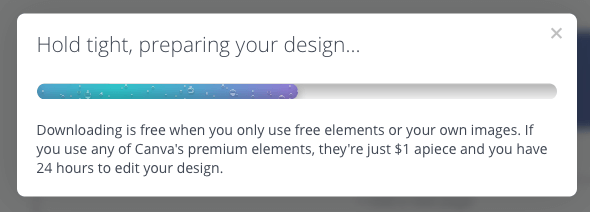
The download is going to be completed in a few seconds. As the pop-up says, here is the time you need to pay for the paid (premium) resources you used for your creation.
Tada! Here is the blog banner I created for this particular post! Pretty simple, wasn’t it?

On the side note, here is other fun graphics I created using Canva specifically for the purpose of social media posts. I might be addicted to Canva? lol
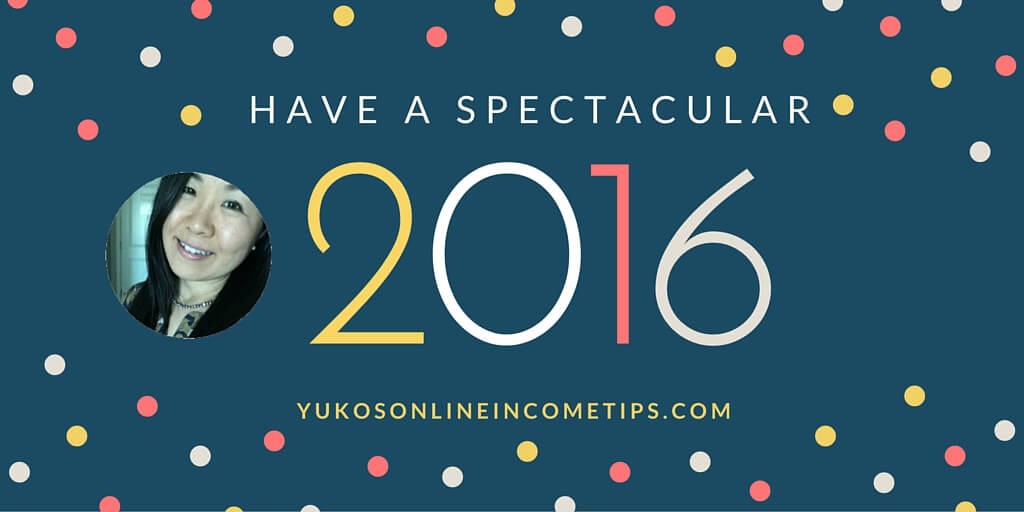
- New Year greeting to my followers.
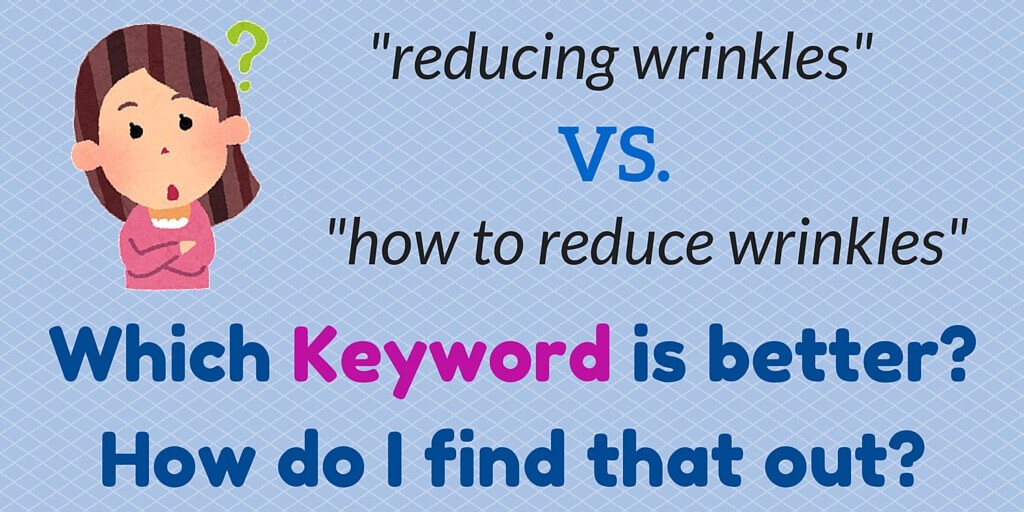
- Small banners to promote my content.
Making your own banner free is not only possible but surprisingly easy with Canva. I hope you found this tutorial post helpful and now feel comfortable enough to create your own images!
I have one favor to ask.
I want you to go back to your website, write an article with an image you created using Canva, come back here and post the link to the article below within the comment area. (free traffic for you 🙂 ) Share your masterpiece with us!
If you have any questions or comments, do leave them below too. Let your creative side emerge!
Yuko

All I can say is Dead on. I’m a blogger and I spend hours on canva. I’ve found that since I started using it my content is much more visually appealing and in sync.
Did you know that Canva even has a WordPress plug-in that lets you edit your images while you write your blog?
It really is an amazing tool to find on a browser and free to boot.
Hi Darren,
I didn’t know that they even have a plugin. That’s awesome to know, I should definitely look into it!
Canva is a must have for us bloggers for sure. I can easily imagine you spending hours on it. I do too because it’s just so fun to use. I think it’s great that the company made it available for free to everybody.
Yuko
Wow Yuko – this couldn’t have come at a better time for me! The big task for Week 1 of January for me was to find a GOOD way to create my own images for my sites – and how helpful has this article been! I can’t wait to get started and I’ll try and remember to come back and post my links 🙂
Hi Shaz,
Great that this post came along in a right time for you! Go ahead and enjoy making your own images. It may take a bit to get used to it, but once you get the hang of it Canva will save you so much time. Let me know if you need any help. I cannot wait to see your first masterpiece!
Yuko
Hey Yuko
Thank you for the review of Canva. First of all, I have never heard of it. So to read your review helped me a lot.
I love the fact that you can create your own banner as I see you did with a lot of your links. I will use it and then post a link to your page. Thank you so much for the detailed description!
Michelle
Hi Michelle,
You didn’t know about Canva? I urge you to start using it!
I’m glad that my post could show the value of it. I used to spend hours to find an image that perfectly fit my content but after discovering Canva, no need to do that anymore as I can make an image relevant to my post! It will save you lots of time and frustration. Look forward to your masterpiece 🙂
Yuko
Hi Yuko,
Canva is a really awesome free resource that I use only occasionally at the moment. I am used to using other software and I continue with that, rather than taking the time to explore Canva. I think after reading your post, I will finally use Canva more. So many people say great things about it, maybe I am missing something.
Great tutorial. You really do show how easy it is to create a banner. I am sure this will help many, me included. Many thanks.
Hi Peter,
Thanks for dropping by. What software do you use? I also used to use Pixir and the images of my older posts are made with Pixir. I still use it occasionally for certain features, but absolutely find Canva lots easier to use. If you are already good with another tool, I am sure it won’t take much time for you to master Canva 🙂
Wish you a great success with your website Peter. Happy 2016!
Yuko
Great blog post Yuko!
Thank you so much for this training. Can’t wait to try it out!
~Peter
Thanks Peter!
I hope this blog helped you to solve some issues that you were having with creating images. Good luck and let me know if you have any questions.
Yuko
I’ve never heard of this before but looking forward to giving it a try. Also excited because your site currently has the same theme as mine so I can visualize the content more. Thanks for the info & I’ve bookmarked the page.
Hi Josh,
Great! This is actually my third theme. I was not happy with the first two but I like this one very much. Come back and share with us when you create the first image!
Cheers,
Yuko
Hi Yuko!
Thank you very much for your post. I was looking for a tool which I can use to make pictures for my facebook ads for ages. You helped my find it and saved my tons of time. Thank you very much again.
I wish you the very best,
Michal
Hi Michal,
Glad that this post helped you with Facebook Ad campaign! I have used Canva to create a few FB ads myself and it did create quite a bit “Likes.”
It definitely worth a try, as it is 100% free and so easy to use. I bet it will expand the possibility in your visual promotions. Wish you the best of luck with your campaigns!
Yuko
Hi!
Awesome and detailed tutorial and explanation of Canva. I use it all the time myself. Mostly for Pinterest pictures, twitter headings and facebook headings etc.
I love how professional I get the results every single time. 🙂 And that is free is also a big plus, even if you can buy som small upgrades if you want.
Andreas
Hi Andreas,
Happy to find a fellow Canva lover 🙂 I used to use other online graphic tools but nothing comes close to Canva for its simple usage and high quality of outcome. I too amaze myself sometimes how professional the image I created looks!
Highly recommended to anyone who is new to creating their own graphics. Thanks for sharing your experience with Canva!
Yuko
Thank you for sharing these tips Yuko!
I have heard about Canva but never really used it before. After reading this I am going to use Canva to create own graphics. I have only used Paint sometimes and it’s also quite useful but I believe that Canva can be a better tool. What do you think?
Hi Roope,
You definitely should give Canva a try! I haven’t used Paint so cannot give you my thoughts in comparison but I can almost guarantee you that Canva will be easier to use.
If you ever created a graphic using Canva, let us know that you thought of it and leave a link to your post with the graphic here so that we can take a look at it. I’ll look forward to your masterpiece! 😉
Yuko